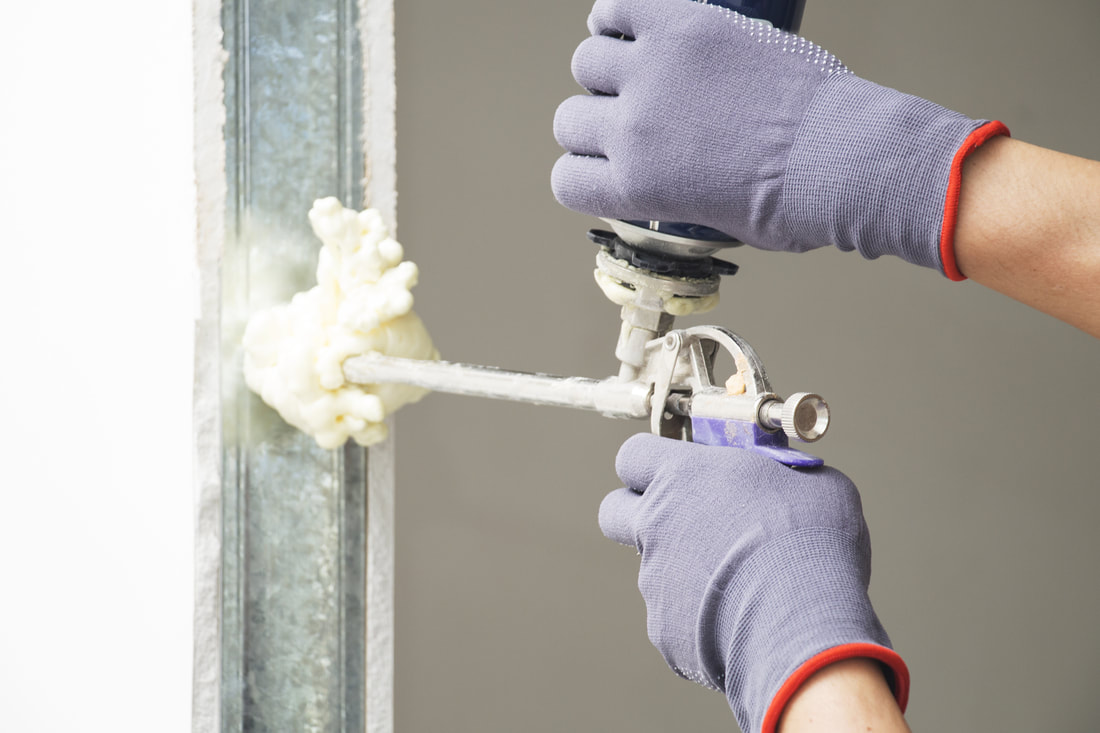
 The spray foam insulation kit is a two-part system that's designed to air seal and insulate any residential, commercial, industrial, or agricultural structure. They're easy to apply and offer superior R-values that can help reduce your heating and cooling costs. The cheapest spray foam kits cost around $100, but they don't include the nozzles and other equipment you need for installation, so it's worth spending some extra money to get everything you need. In addition, you'll want to buy plastic and tape to pre-prep walls before applying the product. Before you start, make sure you're wearing the proper safety gear. This includes eye protection, a respirator, and a full suit with a hood and a hat. You'll also need chemical-resistant gloves. You can tuck these into the suit or tape them to the sleeves. Wearing protective clothing is a must when working with spray foam insulation. The foam is toxic, so you should only work in a well-ventilated area and be careful not to touch the nozzle. It is also a fire hazard, so you should keep all potential sources of ignition out of reach. This means you should be away from your oil-fired furnace, or any other combustible material. If you have any electric boxes or wires in the wall, ensure they are covered and sealed before spraying. Otherwise, they may re-enter the wall later. This can damage the foam's ability to insulate your home and make it difficult for you to remove the product once it's cured. You should only spray a small amount at a time. If you spray too much, it can dilute the strength of the foam and cause thermal bypass. The foam can also contract, causing it to pull away from the surface of the wall and cause additional heat loss or gain. Be sure to spray the foam at a temperature that is lower than the room or surface temperatures. Using a ColorWise(tm) Temperature Warning Nozzle can help ensure that your foam is always being sprayed at the right temperature. Check out this website for more details regarding spray foam insulation kits. Spraying at a low temperature will reduce the bonding between the chemicals and the surface and increase the adhesion of the foam to the material. This can help prevent cracking and tearing, which can occur in older homes. When you're ready to apply the foam, it's best to have a helper with you. They can help hold the hoses, prevent the chemicals from getting into other areas, and make sure you don't go over any hot spots. It is important to keep the temperature of your chemical and the surface or room temperature as close to 75 degrees F as possible. This can help minimize dripping, which is a common problem with spray foam applications. You should also use a fan or cone-shaped spray nozzle to create different spray patterns for better coverage. A fan spray nozzle will create a smoother, more uniform spread, while a cone-shaped nozzle will give you more control over where the foam is being applied and how thick it is. For a general overview of this topic, click here: https://www.ehow.com/how_7867178_homemade-foam-insulation.html.
0 Comments
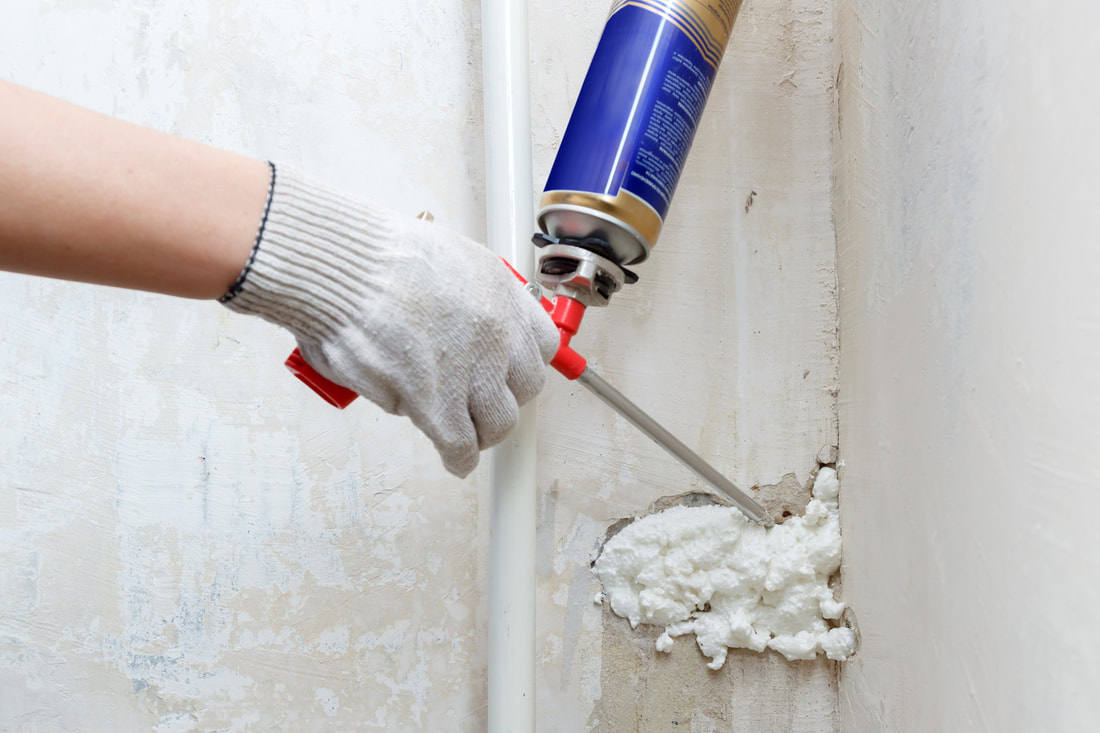 Spray foam insulation kits are an excellent option if you are in the market for sealing and insulating certain spaces within your home. They are a great alternative to a professional installation and save you money in the long run! Spray Foam Kits Cost The cost of a DIY spray foam insulation kit will depend on the amount of surface area that you need to insulate. It will also depend on whether the kit uses closed-cell or open-cell foam. Closed-cell DIY kits will generally cost you on average, $150 more than an open-cell kit. These are best suited for smaller projects, like patching up existing insulation or insulating around doors and windows. If you are looking to insulate your entire home, a professional installation will usually be the most cost-effective choice. However, if you have the time and the skills needed to perform an extensive foam application, it may be worth it for you to take on the project yourself. You can expect to pay between $40 and $700 for a do-it-yourself spray foam kit that yields 12 to 15 board feet of insulation. These are great options for various DIY projects, including insulating small spaces, such as around doors and windows, and insulating the attic or crawl space. For a larger project, you can expect to pay anywhere between $300 and $350 for an open-cell spray foam kit that yields up to 200 board feet of foam. To get the most reliable wholesale Spray Foam, visit this company. These are good options for a variety of DIY projects, such as insulating walls and floors, lining the exterior walls of your house, and sealing roof and wall junctions. When insulating walls, spray foam must be sprayed in layers. This is a good idea because it allows the foam to expand before you cover it with a sheathing layer. This ensures that the voids between the studs and sheathing are filled with foam, reducing the possibility of bulges. It is also important to note that if you are planning to insulate an interior wall, you will need a fire-rated foam, such as Froth-Pak(tm). This type of insulation has a Class A fire rating, which means it can be sprayed up to 2 inches thick without the need for a separate fire barrier. Fire-rated spray foam will seal gaps and prevent air and moisture infiltration, making it an ideal choice for a wide range of insulation applications. It also protects the environment by containing no VOCs, CFCs, Formaldehyde, or PENTA-BDEs. If you are interested in a spray foam kit for insulating your home, talk to a contractor about the product and delivery system that is right for you. These products are easy to apply and come with a quick cure, ensuring they provide years of service in your home. The foam must be sprayed in the presence of a heat source. Ideally, this is from a propane heater or a heat gun. It can also be sprayed by a portable gas heater or a hot water tank, but these must be vented outside to reduce the risk of a fire. To learn more about this topic, check out this related blog post: https://www.huffpost.com/entry/energy-efficient-building_n_343922. 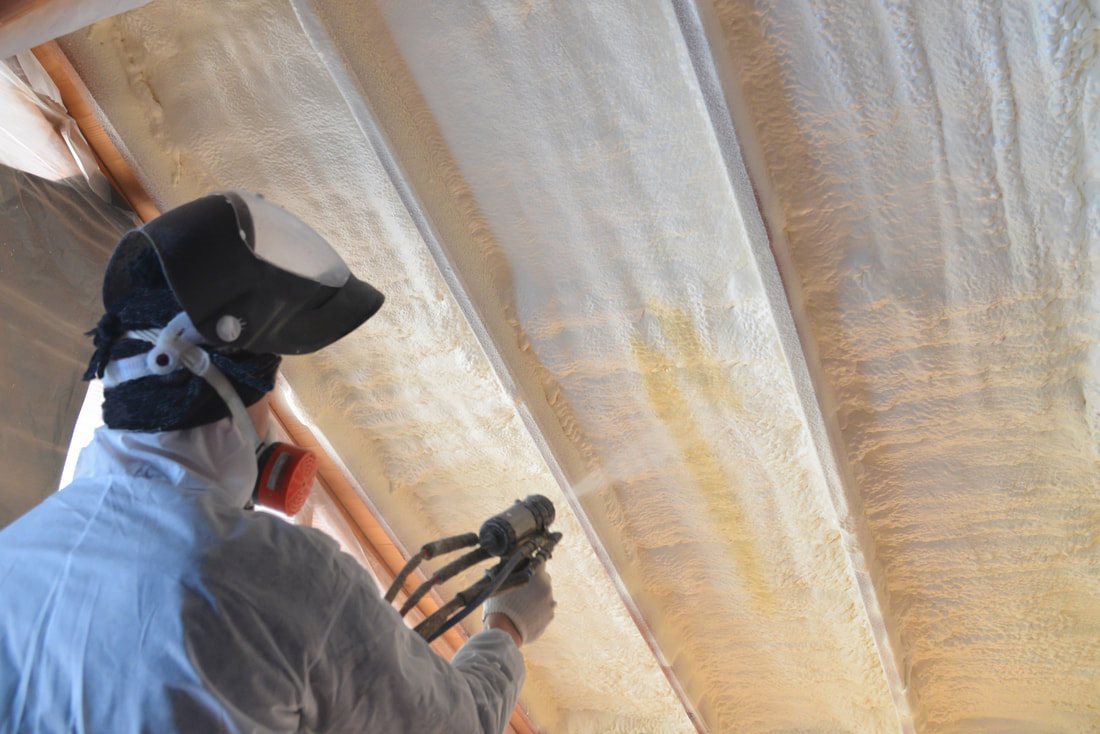 A spray foam insulation kit is a great way to save money on your home's energy costs. This advanced two-part foam system can be used to seal air leaks and insulate walls, windows,s, and doors. It's also a good option for insulating a basement, crawl space, or attic. Buying the right spray foam kit A good spray foam kit is the key to successful home insulation, especially in a large project like an attic or crawl space. The right kind of foam is important for a variety of reasons, including providing better air tightness and keeping your house more comfortable. One type of foam is more expensive than another, so it's wise to consider your budget before you decide which type of kit is right for you. If you're on a tight budget, it's likely best to get discount spray foam kit, which can be a little less expensive than open-cell foam. You'll need a certain amount of foam for the job, so it's best to determine the total square footage that you want to insulate before shopping for a spray foam kit. Most kits have a minimum of 300 board feet, though it's also possible to find 100- or even 200-board-foot ones on the market. Cost and Insurance If installing the foam yourself, you'll need to buy a hose, gun, and spray tips (most come with extra tips). It's also important to ensure you've got everything you need before you begin, including ladders, plastic,c, and tape for prepping and venting the fumes. Having someone else watch you while you're spraying is also a good idea. They can make sure you don't miss a spot, or that you don't use too much foam. This will save you the cost of hiring a contractor to do it for you. If you decide to hire a professional, it's possible you could pay upwards of $1,300 for the job. Adding bulk with fiberglass batt If your foam isn't providing enough R-value, you can add fiberglass batts on top of it to increase it. This is known as "flash and batt," which can help you build up the R-value of your insulation foam without having to worry about air leaks between the foam and the fiberglass. You'll need to picture-frame the wall cavities and spray the perimeter with a lift before you lay down the first layer of foam. This will help the foam penetrate any voids between the studs and sheathing. This will reduce the risk of a bulge in the sheathing and help the foam stick to it, which will help prevent air leaks. Before you fill a cavity with foam, you'll need to wait a few minutes so it can expand. That's why it's a good idea to get a pin depth gauge or test a section of wire hanger at the desired depth to ensure you're using the proper amount of foam. You can get more enlightened about this topic by reading here: https://www.ehow.com/how_8031332_fill-concrete-block-spray-foam.html. |
AuthorWrite something about yourself. No need to be fancy, just an overview. ArchivesCategories |
 RSS Feed
